Editing for retention · Lesson 5
Color grading with a LUT
A LUT is a recipe, not a filter. What a LUT actually does, why it goes on after correction and on its own layer, the intensity dial, and how to match the rest of the shots to the one that looks right.
You drop a LUT on a clip and the frame goes cinematic for exactly one second, until you notice the skin went orange, the sky went cream and the shadows turned into soup. So you pull the LUT off and decide LUTs are a scam. They aren’t. A LUT is a recipe, and what you just did was pour the sauce on before cooking anything. Used in the right order, on the right footage, a good LUT is the fastest way a solo creator gets a consistent look across a whole video. This lesson is that order.
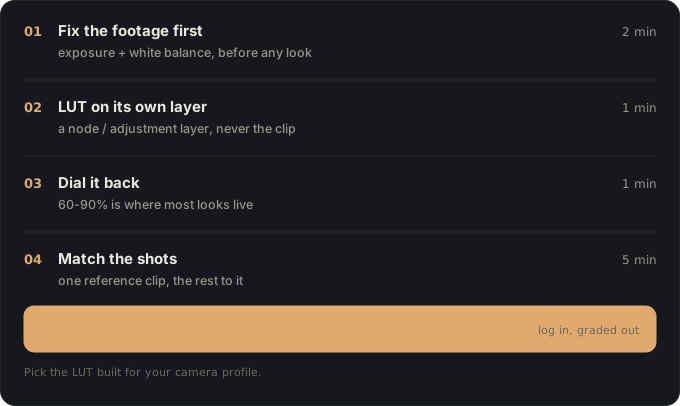
What a LUT actually is
A LUT (look-up table) is a list of answers to one question: “when a pixel is this color, what color should it become?” A .cube file is nothing more than a grid of those answers, a few thousand of them, and your editor blends between the nearest entries for every pixel in the frame. That is the whole technology, and it explains everything a LUT can and cannot do.
It can shift hues, push saturation, warm or cool a range of tones, and reshape contrast, because all of those are “this color becomes that color”. It cannot know where a pixel sits in the frame. So a LUT never adds glow, softens skin, removes noise, sharpens, or vignettes: anything that depends on the neighbors of a pixel is outside its reach. When a LUT pack promises a dreamy bloom, the bloom in the demo came from a separate effect. Knowing this saves you from chasing a LUT for a job a LUT cannot do.
The second thing to know: a LUT is built for a specific input. A LUT designed for flat log footage (Sony S-Log, Canon C-Log, Panasonic V-Log) expects that washed-out, low-contrast image and contains the conversion to a normal picture inside it. Feed it normal footage and it applies that conversion a second time: crushed blacks, blown highlights, neon color. That mismatch, not the LUT’s quality, is behind most “this LUT ruined my footage” stories. Adobe’s own Lumetri panel separates the two jobs for exactly this reason: an Input LUT in Basic Correction for technical conversion, a Creative Look for style.
Step 1: correct before you look
Fix the footage before you style it, because the LUT was built on footage that was already right. Two things, both in your editor’s basic correction tools, before any LUT touches the clip:
- Exposure. Get skin and mid-tones into their normal zone. A LUT applied to an underexposed clip will stretch the dark, noisy part of the image into view; applied to an overexposed one, it will send the highlights past white. Neither is the LUT’s fault, and neither can be fixed after it.
- White balance. Neutralize the cast. A LUT that warms the highlights will turn an already-warm clip orange, and cool a blue-cast clip into steel. Give it a neutral starting point and it does what its designer intended.
If the footage is noisy, denoise here too, before the LUT. Contrast reveals noise; a LUT adds contrast; noise reduction after the fact is fighting uphill.
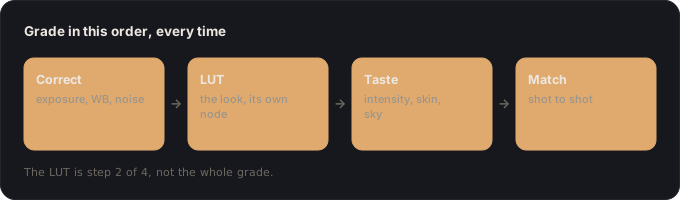
Step 2: the right LUT for the footage
Match the LUT to what you shot. Three cases cover nearly everyone:
- You shot log (S-Log2/3, C-Log, V-Log, or your camera’s “flat” profile): use the LUT version made for that profile. It contains the conversion to a normal picture, so you apply it to the raw log clip directly, with nothing in front of it except the corrections from step 1.
- You shot a normal profile (standard, Rec.709, a phone): use a LUT made for Rec.709 or “generic” footage. Never the log version.
- You are unsure: look at the clip. Log looks gray, milky and low-contrast straight out of the camera, with colors that seem drained. Normal footage looks, well, normal. If it looks normal, it is not log.
Step 3: on its own layer, dialed back
Never apply a LUT to the clip itself. Put it on its own node (DaVinci Resolve: a serial node after your correction node, then right-click it and choose the LUT), or on an adjustment layer above the clips (Premiere Pro, Final Cut). Two reasons. First, you can switch it off to compare, or swap it for another, without touching the corrections underneath. Second, you can turn it down.
That intensity dial is where most of the craft lives. Premiere’s Creative tab has an explicit Intensity slider under the Look; in Resolve, lower the node’s key output gain, or blend it against the previous node. Almost every look sits better between 60 and 90 percent than at 100: the designer tuned it on their footage, not yours, and the last quarter of a look is usually the part that reads as a filter instead of as lighting. Pull it back until the image stops announcing that it has been graded, then stop.
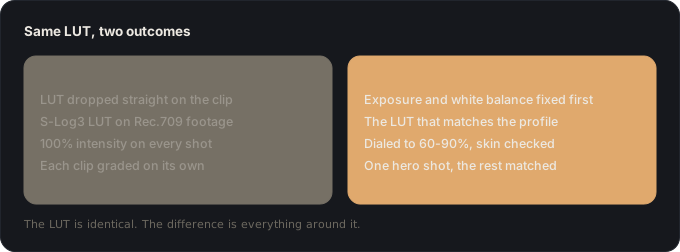
Step 4: skin, sky, and the other shots
Three checks after the LUT is on, in this order, because each one is more expensive to fix than the last.
Skin. Faces are the one thing every viewer has a reference for. If skin went orange, pull the intensity down or add a small hue correction on the skin range after the LUT, never before it. If skin went gray, the LUT was probably desaturating the mid-tones; look for a version of the look that protects skin, or lift saturation back on that range only.
Sky and water. The second thing eyes know the true color of. Warm LUTs are the usual offender: a blue sky sliding toward cream under a golden look is the giveaway of a grade applied without checking. A well-built look guards blues; if yours does not, a secondary correction on the blue range fixes it in a minute.
The rest of the shots. Grade one hero shot until it is right, then match every other clip to it rather than grading each on its own. The fastest way: copy the correction node from the hero, paste it on the next clip, and adjust only exposure and white balance until the two frames sit side by side without a jump. Consistency across a video is worth more than the perfect grade on any single shot, because the viewer’s attention treats visual change as a claim about meaning, and an accidental change of look is a claim you never meant to make.
When the LUT belongs in the edit
Color is polish, and polish comes last: after structure is locked and rhythm is done, on sections that have earned their place twice. Grading a scene that gets cut tomorrow is the most expensive way to spend an evening. Once you are there, the four steps take minutes per shot, which is the entire argument for a LUT over a hand grade for a solo channel: a consistent look, delivered at the speed a weekly upload allows, with a clear point where the polishing stops.
The LUT check
- Exposure and white balance corrected before any look was applied.
- The LUT matches the footage: a log LUT on log, a Rec.709 LUT on everything else.
- The LUT sits on its own node or adjustment layer, never on the clip.
- Intensity dialed back until the image stops looking filtered (60 to 90 percent for most looks).
- Skin and sky checked after the LUT, corrected after it if needed.
- One hero shot graded, every other shot matched to it.
🎬 Video script
- Open on the disaster: drop a log LUT on a normal clip on camera, watch it explode. “Every LUT tutorial skips the one thing that makes this work.”
- Show the same LUT, same clip, correct order: correction, LUT on a node, intensity to 75. It looks like lighting.
- The log test: hold up a log clip and a normal clip side by side. “Gray and milky means log. That is the whole test.”
- Skin and sky check on a real shot, then the shot-match trick: copy the hero node, adjust only exposure.
- Close: “A LUT is a recipe. Cook first, then sauce, then taste. In that order, every clip.”
Sources
- Adobe, Color management and Lumetri Color: the Input LUT (technical conversion, Basic Correction) versus the Creative Look with its Intensity slider.
- Blackmagic Design, The Colorist Guide to DaVinci Resolve 18: applying LUTs on nodes in the Color page, correction before look.
- Sony, S-Log explained: why log footage looks flat out of the camera and needs conversion before it reads as a normal picture.
- Vanpelt Studio, the free LUT library: every look here is generated from scratch, with the per-profile versions this lesson tells you to pick.
Key takeaways
- A LUT is a frozen color recipe: it changes colors, never light or sharpness.
- Correct first, then the LUT on its own layer, then taste, then match: in that order.
- The LUT must match your footage: a log LUT on normal footage is the most common ruined grade.